
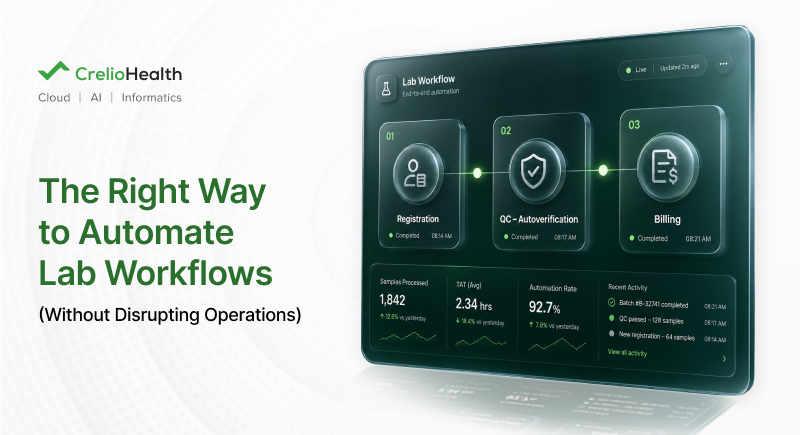


Lab workflow automation is the use of software and integrated instruments to handle repetitive lab tasks in a lab’s process cycle with little or no manual intervention, i.e., from patient registration to report delivery. Instead of staff moving samples, data, and approvals along by hand, rules built into the system move work from one stage to the next. The goal is faster turnaround, fewer transcription and handling errors, and more time for staff to focus on abnormal results and complex cases, while keeping every step traceable for audits.
Lab Workflow Automation at a Glance
The framework in this guide runs in three phases over about 36 weeks. Each phase depends on clean data from the one before it.
| Phase | Timing | What to automate | Why at this stage | What to measure |
| 1. High impact, low clinical risk | Weeks 1–8 | Patient registration, digital report dispatch, instrument result capture | Removes manual work without changing any clinical decision | Registration time per patient, result-status calls, manual result corrections |
| 2. Operational intelligence and quality | Weeks 8–20 | Inventory, QC monitoring and flagging, auto-verification | Needs the interfaced, reliable data that Phase 1 creates | Stockouts and expired reagents, time to QC review, share of eligible results auto-verified |
| 3. Financial and referral management | Weeks 20–36 | Billing and claims, referral lab management | Billing automation repeats upstream errors at scale, so upstream data must be stable first | Claim denial rate, days in accounts receivable, referral turnaround time |
Lab automation failures are almost always sequencing failures. Labs that try to automate everything simultaneously overwhelm their staff, create compounding configuration errors, and end up rolling back to manual workflows at high cost. Labs that succeed pick a deliberate sequence: highest impact, lowest disruption first, and build staff confidence and process stability at each phase before they move to the next. This is that sequence.
A 200-bed hospital lab that interfaces with eight analyzers, automates QC flagging, and switches on auto-verification in the same go-live week is not automating; it is running three points of failure simultaneously with no way to isolate which one caused a result to be released incorrectly. Lab workflow automation only works when it follows an order, and most labs get the order wrong.
How to automate a laboratory workflow in five steps
1. Map and measure your current workflow. Record how long each step takes and where staff retype data. A laboratory workflow chart makes the bottlenecks visible.
2. Automate the low-risk steps first. Start with registration, report dispatch, and analyzer interfaces.
3. Add quality automation on clean data. Turn on inventory tracking, QC flagging, and auto-verification only after Phase 1 data is reliable.
4. Automate billing and referrals last. These steps inherit every upstream error, so they come after the clinical workflow is stable.
5. Hit each phase’s success metric before you start the next. Moving early is how most rollouts stall.
Lab Workflow Automation Sequencing Principles: Why Order Matters
Ask ten lab directors why their lab workflow automation rollout stalled, and eight will describe the same pattern: too many systems changed at once, no clear way to isolate a failure point, and a staff that lost confidence in the software before it had a chance to prove itself. Automate lab processes out of sequence, and you don’t just risk technical failure; you risk the credibility of the entire initiative with the people who have to use it every day.
The “Glass Floor” Problem
Every lab has a minimum operational floor: patients must be registered, specimens must be processed, and results must be delivered. Automate any workflow that sits on this glass floor without a tested rollback plan, and you put patient care continuity at risk. A misconfiguration in one workflow should never reach the workflows a patient’s care depends on, and a phased sequence ensures it doesn’t. A CAP Q-Probes study on laboratory automation found that labs experiencing rollback events after go-live cited inadequate phased testing as the leading cause, not the technology itself.
The Compound Confidence Model
Each completed phase of lab automation sequencing builds two things at once: staff confidence in the system and organizational competence in configuration. A technologist who watches registration automation cut wait times without a single billing error approaches auto-verification eighteen weeks later as a proven system, not an untested one. Skip a phase, and you lose more than the operational benefits of that phase; you lose the trust capital needed to clear the next one.
Phase 1: High Impact, Zero Clinical Risk (Weeks 1–8)
Phase 1 applies a single filter: does this workflow touch a clinical decision? If not, it belongs here. These are the highest-volume, lowest-risk targets in any LIMS automation implementation, and they should come first.
1a. Patient Registration Automation
- What it replaces: Manual demographic entry, handwritten registration forms
- How to automate: LIMS kiosk registration, insurance eligibility pre-verification, demographic auto-populate from insurance ID
- Why first: Registration touches every patient but carries no analytical risk. Errors surface immediately, and staff can correct them before a specimen is drawn.
- Success metric: Registration time per patient drops from 4–6 minutes to under 90 seconds.
A mid-sized outreach lab processing 800 registrations a day at five minutes each spends roughly 67 staff-hours daily on data entry. At 90 seconds per registration, that drops by close to 50 hours, capacity that can redirect to specimen handling and patient-facing work without adding headcount.
1b. Digital Report Dispatch
- What it replaces: Manual fax, phone-call results delivery, PDF email from a desktop
- How to automate: Auto-dispatch of final reports via provider portal, fax automation, and patient portal on result verification
- Why first: Dispatch automation delivers immediate, measurable ROI with no clinical risk — the report has already been verified before dispatch touches it.
- Success Metrics: Report delivery staff time drops daily; provider call volume for result inquiries falls within two weeks.
Labs that automate dispatch typically see “where is my result” call volume fall within the first two weeks, because the report reaches the ordering physician the moment the technologist verifies it instead of sitting in a fax queue.
1c. Instrument Result Capture (Bidirectional Interfaces)
- What it replaces: Manual result transcription from analyzer printouts into the LIS
- How to automate: Bidirectional HL7 interfaces between each analyzer and the LIMS
- Why third in Phase 1, not first: Interface builds require vendor coordination and validation testing. Prioritize the highest-volume, highest-risk analyzers first; a fully validated single interface builds more confidence than five half-validated ones.
- Success metrics: Manual transcription errors reach zero for interfaced analyzers; TAT on high-volume panels improves measurably.
Transcription is the most error-prone manual step in result reporting. CLSI guidance on laboratory automation identifies manual transcription as a leading source of preventable result discrepancies. Interfacing with a chemistry analyzer that runs 60% of the daily volume first, before tackling hematology, coagulation, or microbiology in parallel, gives the lab a single, validated interface to build on.
Phase 2: Operational Intelligence and Quality (Weeks 8–20)
Phase 2 only works if Phase 1 is fully live. Inventory accuracy, QC automation, and auto-verification all depend on clean, interfaced data flowing through the system. None of them should go live against a workflow that is still partly manual.
2a. Inventory Management Automation
- What it replaces: Manual stock counts, spreadsheet-based reorder management
- How to automate: LIMS-integrated inventory with consumption tracking per test run, automatic reorder alerts at minimum stock levels
- Why Phase 2, not Phase 1: Consumption tracking is only reliable once Phase 1 instrument interfaces are live and validated. Without an interfaced analyzer reporting actual test counts, tracking consumption is guesswork built on manual run logs, and guesswork is what produces the expired-reagent write-offs labs want to eliminate.
- Success metrics: Reagent expiration waste drops 30–50%; stockout events approach zero.
Without an interfaced analyzer reporting actual test counts, consumption tracking is guesswork built on manual run logs, and guesswork is exactly what produces the expired-reagent write-offs labs are trying to eliminate.
2b. QC Monitoring and Flagging Automation
- What it replaces: Manual Levey-Jennings charting, end-of-shift QC review
- How to automate: LIMS auto-captures QC results from the interface, applies Westgard rules, and generates real-time alerts for out-of-control events
- Why Phase 2: QC automation requires a validated instrument interface (Phase 1c) and a confirmed QC rule configuration. Configure QC automation before confirming interface data integrity, and the lab automates quality checks on top of data it has not yet verified.
- Success metric: Out-of-control QC events flagged in real time; no out-of-control patient results released without documented supervisory review.
End-of-shift QC review means an out-of-control run can sit undetected for hours while patient results are released against it. Real-time Westgard rule flagging closes that gap, but only when the Phase 1 interface feeding QC data into the LIMS has already been validated.
2c. Auto-verification
- What it replaces: Manual technician review and release of every normal result
- How to automate: Define auto-verification rules based on test, flagging criteria, and exception conditions; configure in LIMS with CAP GEN.43875-compliant annual validation
- Why Phase 2: Auto-verification requires validated interfaces, validated QC, and a complete rule set before go-live. Labs that rush it past Phase 2 without QC confirmation and interface stability – release results against quality data they have not yet confirmed they can trust. This is the single most common source of post-implementation quality events.
- Success metric: 60–80% of eligible results auto-verify; technician time shifted from routine result release to exception review.
When labs sequence correctly: interfaces validated, QC live and stable, rule set complete; 60–80% of routine chemistry and hematology results typically auto-verify. Technologists spend their time on the 20–40% of results that require a trained eye.
Phase 3: Financial and Referral Management (Weeks 20–36)
Phase 3 sits furthest from the clinical bench, and that is exactly why it comes last. Billing and referral automation are only as accurate as the patient demographics, test orders, and result data the two prior phases generate.
3a. Billing and Claims Automation
- What it replaces: Manual CPT code assignment, manual claim generation, manual denial management
- How to automate: LIMS-to-billing platform integration with automated claims scrubbing, payer-specific rule enforcement, and electronic remittance processing
- Why Phase 3: Billing automation requires stable, accurate patient demographics and test orders from Phases 1 and 2. Automate billing on an unstable foundation, and the automation will amplify errors rather than eliminate them. A registration record with a typo in the insurance ID, automated all the way through to a claim, doesn’t get caught once; it gets denied automatically, at scale.
- Success metrics: Denial rate drops 30–50%; days-in-AR improve by 10–15 days within 90 days of go-live.
A registration record with a typo in the insurance ID, automated all the way through to a claim, doesn’t get caught once; it gets denied automatically at scale. That’s why billing automation is sequenced after registration (1a), and result accuracy (Phase 2) is already proven stable in production.
3b. Referral Lab Management
- What it replaces: Manual send-out orders, phone-based status tracking, manual result entry from reference labs
- How to automate: Electronic order transmission to reference labs, automatic result routing on receipt, client-portal access for referring physicians
- Reason for Phase 3: Referral automation requires a stable internal workflow before it can be integrated with external partners. Each reference lab carries its own interface specification, turnaround commitment, and result formats. Attempting this integration before the internal LIMS workflow is stable means troubleshooting two unknowns at once.
Each reference lab partner has its own interface specification, turnaround commitment, and result formats. Attempting this integration before the internal LIMS workflow is stable means troubleshooting two unknowns: the internal system and the external partner simultaneously.
Choosing a Lab Workflow Automation Solution
The framework above works with any system, but the software you choose sets its limits. Before you compare vendors, check five things:
- Interface coverage. Confirm bidirectional interfaces for your specific analyzer models, not a general compatibility list.
- Rules you control. You should be able to write and change auto-verification and QC rules yourself, with a full audit trail.
- Phased activation. Check that you can switch modules on one at a time, so the system supports a phased rollout.
- Billing and referral integration. Confirm that billing reads directly from verified results and that reference-lab interfaces are supported.
- Validation support. Ask what documentation the vendor provides for validating interfaces and auto-verification rules.
For a structured comparison, use the LIMS vendor selection checklist and see the nine workflows that break first in clinical lab software selection.
Frequently Asked Questions About Lab Workflow Automation
Lab workflow automation converts manual tasks in a lab’s process cycle into an automated and connected workflow. From data entry, handling and transfers, chain of custody, verification, validation, and result transfers, everything is handled by software, usually a LIMS or integrated systems & analyzers, to enable little to no manual intervention at every stage of lab management. It covers things like order intake, barcode labeling, sample routing, instrument-to-system result transfer, auto-verification of normal results, QC checks, report delivery, and alerts for critical values or turnaround delays.
You automate lab workflows by first mapping your current process end to end to find the manual, repetitive steps that cause delays or errors. Then you put a LIMS at the center, connect your analyzers through bidirectional interfaces so orders and results flow without retyping, and set up barcode-based sample tracking. From there, configure rules for auto-verification, QC checks, automatic report delivery, and alerts for critical values and turnaround breaches. Roll it out in phases, starting with the highest-volume or most error-prone steps, validate each rule against real data before going live, train staff on handling exceptions, and review turnaround and error metrics regularly to refine the rules.
Analyzers connect to the LIS or LIMS through uni-directional or bidirectional instrument interfaces, often with or without middleware in between. A bidirectional interface sends test orders to the analyzer and returns results to the patient record, matched by sample barcode. Most interfaces use standard message formats, such as the ASTM-based CLSI LIS standards or HL7. Learn why instrument interfacing matters.
Analyzers connect to the LIS or LIMS through instrument interfaces, often with middleware in between. A bidirectional interface sends test orders to the analyzer and returns results to the patient record, matched by sample barcode. Most interfaces use standard message formats, such as the ASTM-based CLSI LIS standards or HL7. Learn why instrument interfacing matters.
Apply the same three phases, one department at a time. Start with the department that has the highest volume and the most standardized tests, because it will show results fastest. Keep the referral and client interfaces for Phase 3, after internal workflows are stable. Managing multiple sites or departments on one standard makes the rollout repeatable.
Auto-verification is safe when rules are validated before go-live and reviewed regularly. Rules typically check QC status, instrument flags, reference and critical ranges, and delta checks against the patient’s previous results. Results that fail any rule go to a technologist for manual review. CLSI publishes guidance on designing and validating these rules in AUTO10.
Conclusion: Automate Like You’re Building a Foundation, Not Installing a Feature
Automation rollouts rarely fail because the software does not work. They fail because labs automate in the wrong order, so a problem in one step spreads to the next before anyone notices.
The phased approach fixes that. Each phase runs on data the previous phase has already cleaned. Staff builds confidence on low-risk steps before automation touches results. And billing goes last, so it never multiplies an upstream error.
Start with a Phase 1 audit. List every place your team retypes data, time each step, and pick the highest-volume analyzer to interface first. To see how this works in CrelioHealth, book a Phase 1 walkthrough with our team.
For the wider picture of how automation benefits your day-to-day operations, read the complete guide to lab workflow management.

